

Salesforce Experience Cloud
Overview
This guide provides steps to integrate a Salesforce Experience Cloud site with IDMe using the SAML 2.0 protocol.
Intended audience
Salesforce administrators and developers responsible for configuring sign-in on an Experience Cloud site.
What you will build
A federated authentication flow where an Experience Cloud site delegates user authentication to IDMe, and Salesforce creates a site user on first sign-in with an Apex just-in-time (JIT) handler.
Result
A Sign in with IDMe button on the site login page. Users who select it authenticate at IDMe and return to the site signed in.
Identity proofing behavior
Authentication behavior, identity verification settings, and returned attributes are driven by IDMe policy configurations.
Salesforce Nonprofit Cloud and other Salesforce clouds use the same Experience Cloud sign-in configuration. The steps in this guide apply to any Experience Cloud site built on an Aura template, where site pages are served under /s/. Orgs that store members as Person Accounts, as many Nonprofit Cloud orgs do, need changes to the JIT handler described in this guide.
Authentication flow
The following steps outline the SAML authentication flow between the user, the Experience Cloud site, and IDMe:
Prerequisites
- A Salesforce org with Experience Cloud licenses (a free Developer Edition org works for testing; sign up at
https://developer.salesforce.com/signup) - System Administrator access to the org
- An Experience Cloud site built on an Aura template (for example, Customer Account Portal)
- An IDMe sandbox account for testing your integration
- The IDMe policy handle for your integration, from your IDMe Solution Consultant
- Understanding of SAML flows and terminology
Environments
IDMe provides two environments:
All IDMe OIDC and SAML endpoints are derived from the base URL above. For production, replace the sandbox base URL in every IDMe endpoint you configure. The SAML issuer is the exception: it is api.idmelabs.com in sandbox and idp.id.me in production.
Examples
- SAML metadata URL (Sandbox):
https://api.idmelabs.com/saml/metadata/provider - SAML metadata URL (Production):
https://api.id.me/saml/metadata/provider - SAML issuer (Sandbox):
api.idmelabs.com - SAML issuer (Production):
idp.id.me
Configure Salesforce
The examples in this guide use the following placeholder values. Substitute your own.
Prepare the site for external users
Select Allow using standard external profiles for self-registration, user creation, and login, then select Save
Skip this step if your site users use a custom profile cloned from a standard external profile.
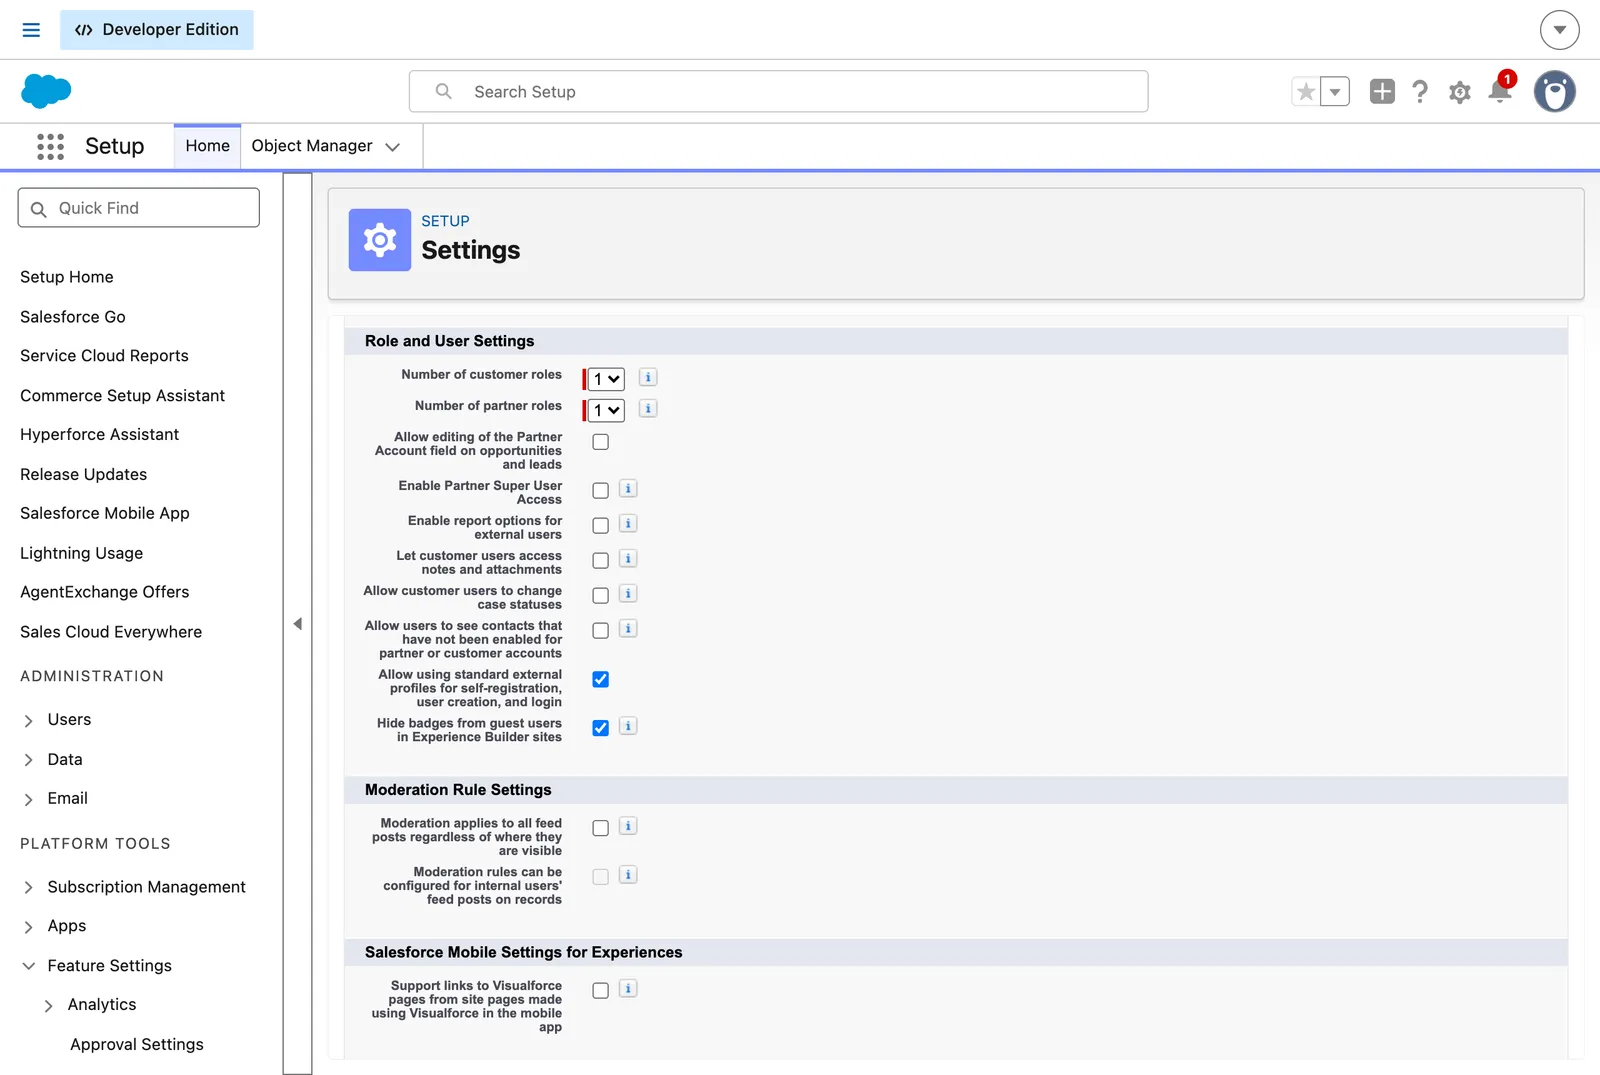
Navigate to Setup > Users and confirm the user who will own the member account has a Role assigned. Salesforce requires the owner of an account that holds site users to have a role.
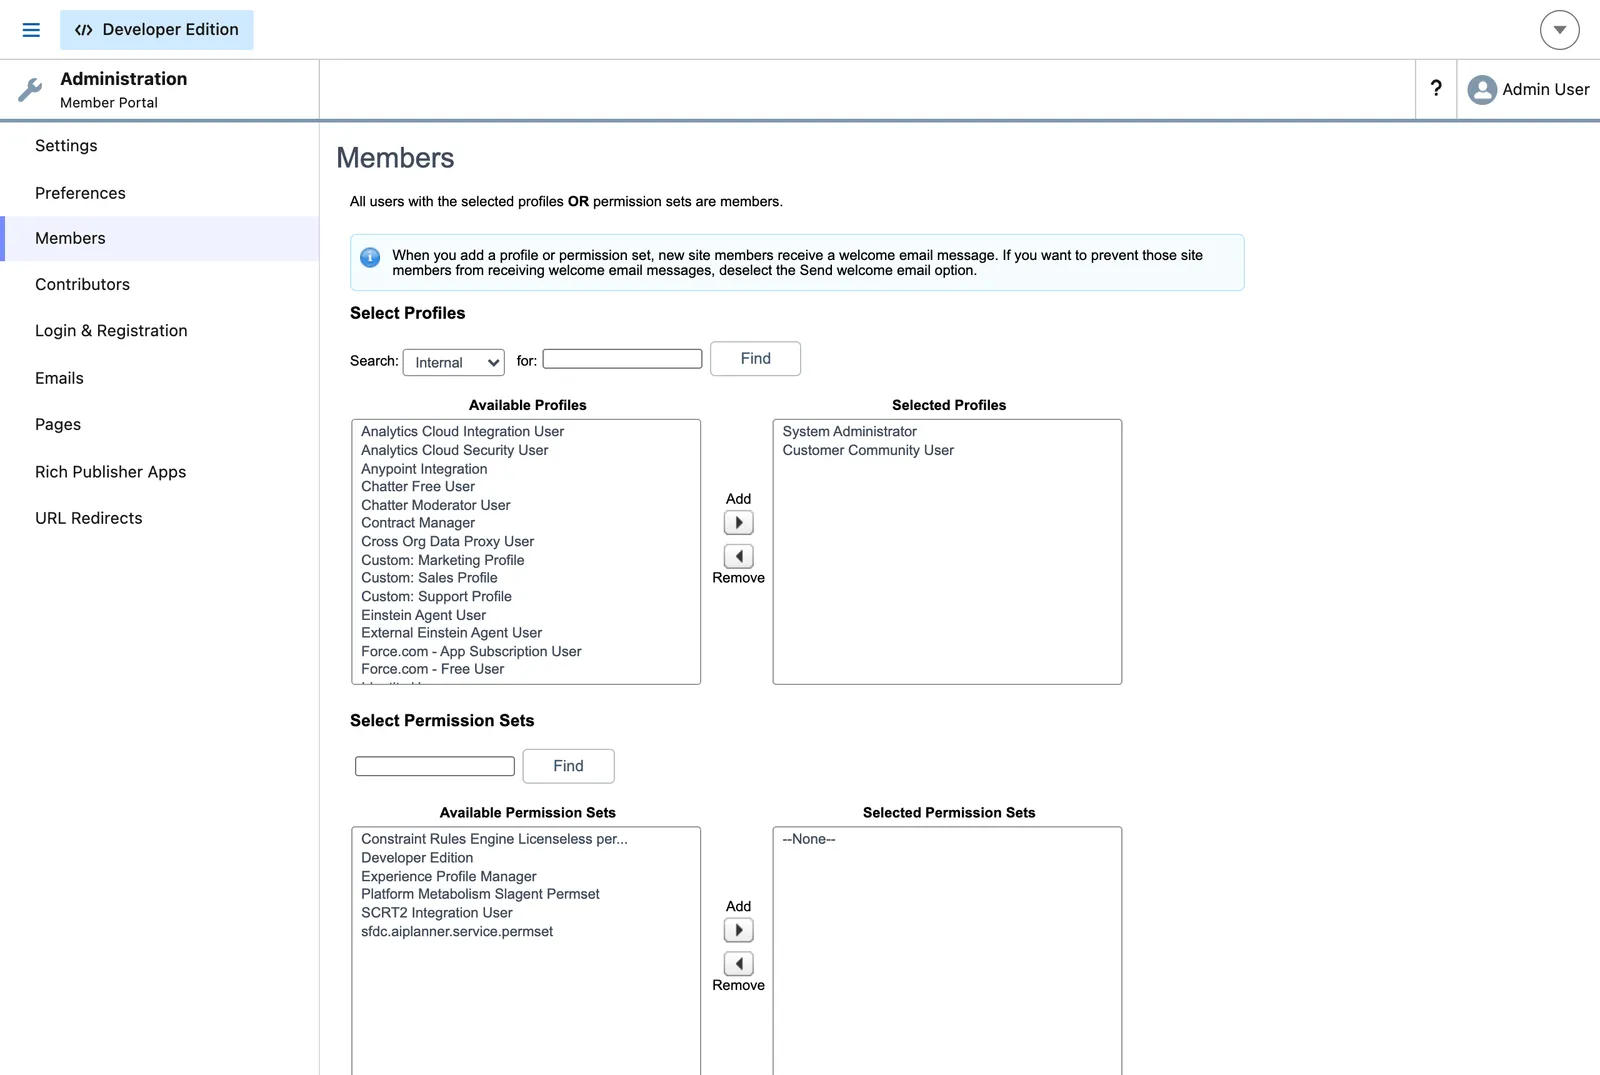
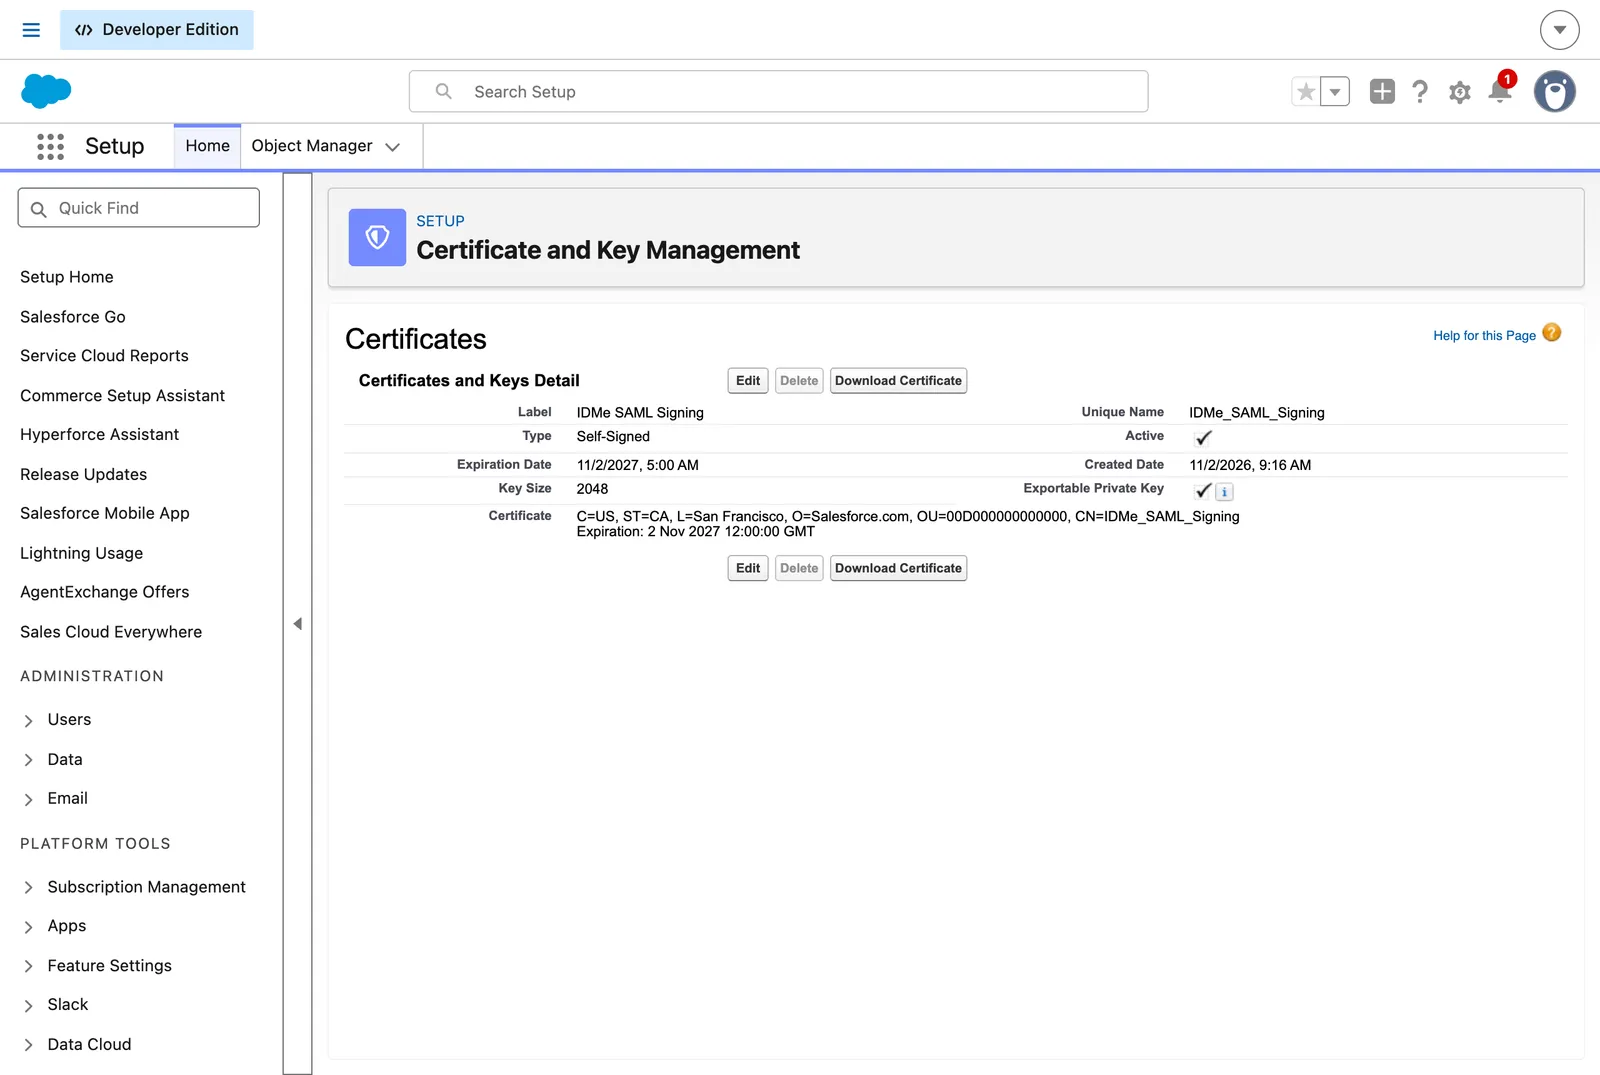
Create a request signing certificate
Salesforce signs every SAML AuthnRequest. It does not allow the default org certificate to be used for this, so create a dedicated certificate.
Plan user provisioning
When a user signs in with IDMe for the first time, Salesforce needs a site user to sign them in to. Salesforce creates that user with just-in-time (JIT) provisioning, using the attributes in the IDMe SAML assertion. In this guide, a JIT handler generated by Salesforce does this, with one addition described in Adapt the JIT handler template.
However you set up provisioning, at a minimum:
- Store the IDMe
uuidin the user’s Federation ID field. Salesforce uses this value to find the user on later sign-ins. Useuuid, not email, as the stable identifier: email addresses can change, anduuiddoes not. - Create each new site user with the site user profile and a Contact under the Account that holds site members.
- Set first name, last name, and email from the IDMe attributes, and update them on later sign-ins.
- Give each user a unique Nickname that does not contain the IDMe
uuid. Salesforce requires a unique nickname for every user, and sites can display it to other members.
Configure IDMe as a SAML identity provider
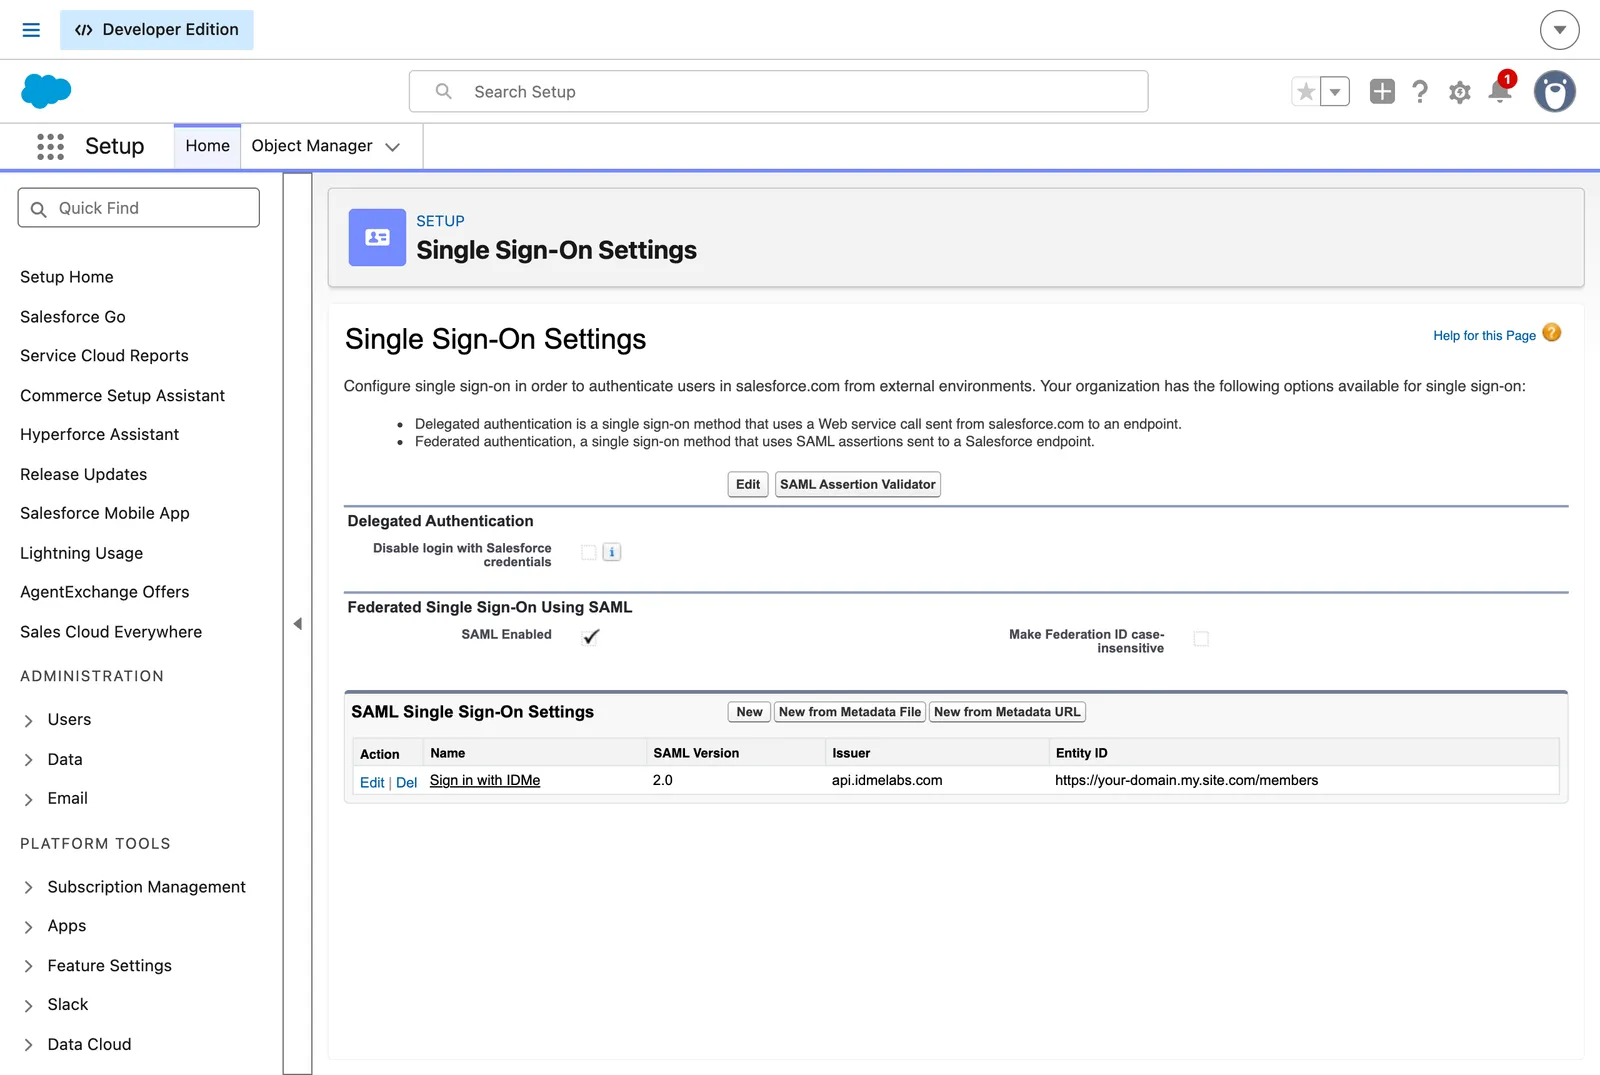
Select SAML Enabled, then select Save
If SAML Enabled is not selected, the IDMe option does not appear in the site’s login settings.
Configure the SAML settings:
To obtain the IDMe Signing Certificate, download the metadata from https://api.idmelabs.com/saml/metadata/provider (production: https://api.id.me/saml/metadata/provider). Copy the X.509 certificate marked active="true" from between the ds:X509Certificate tags, and save it as a PEM file with standard headers.
The Name field is the label shown on the site login button. Salesforce has no field for a requested authentication context, so the IDMe policy handle is passed as the AuthnContext query parameter on the Identity Provider Login URL.

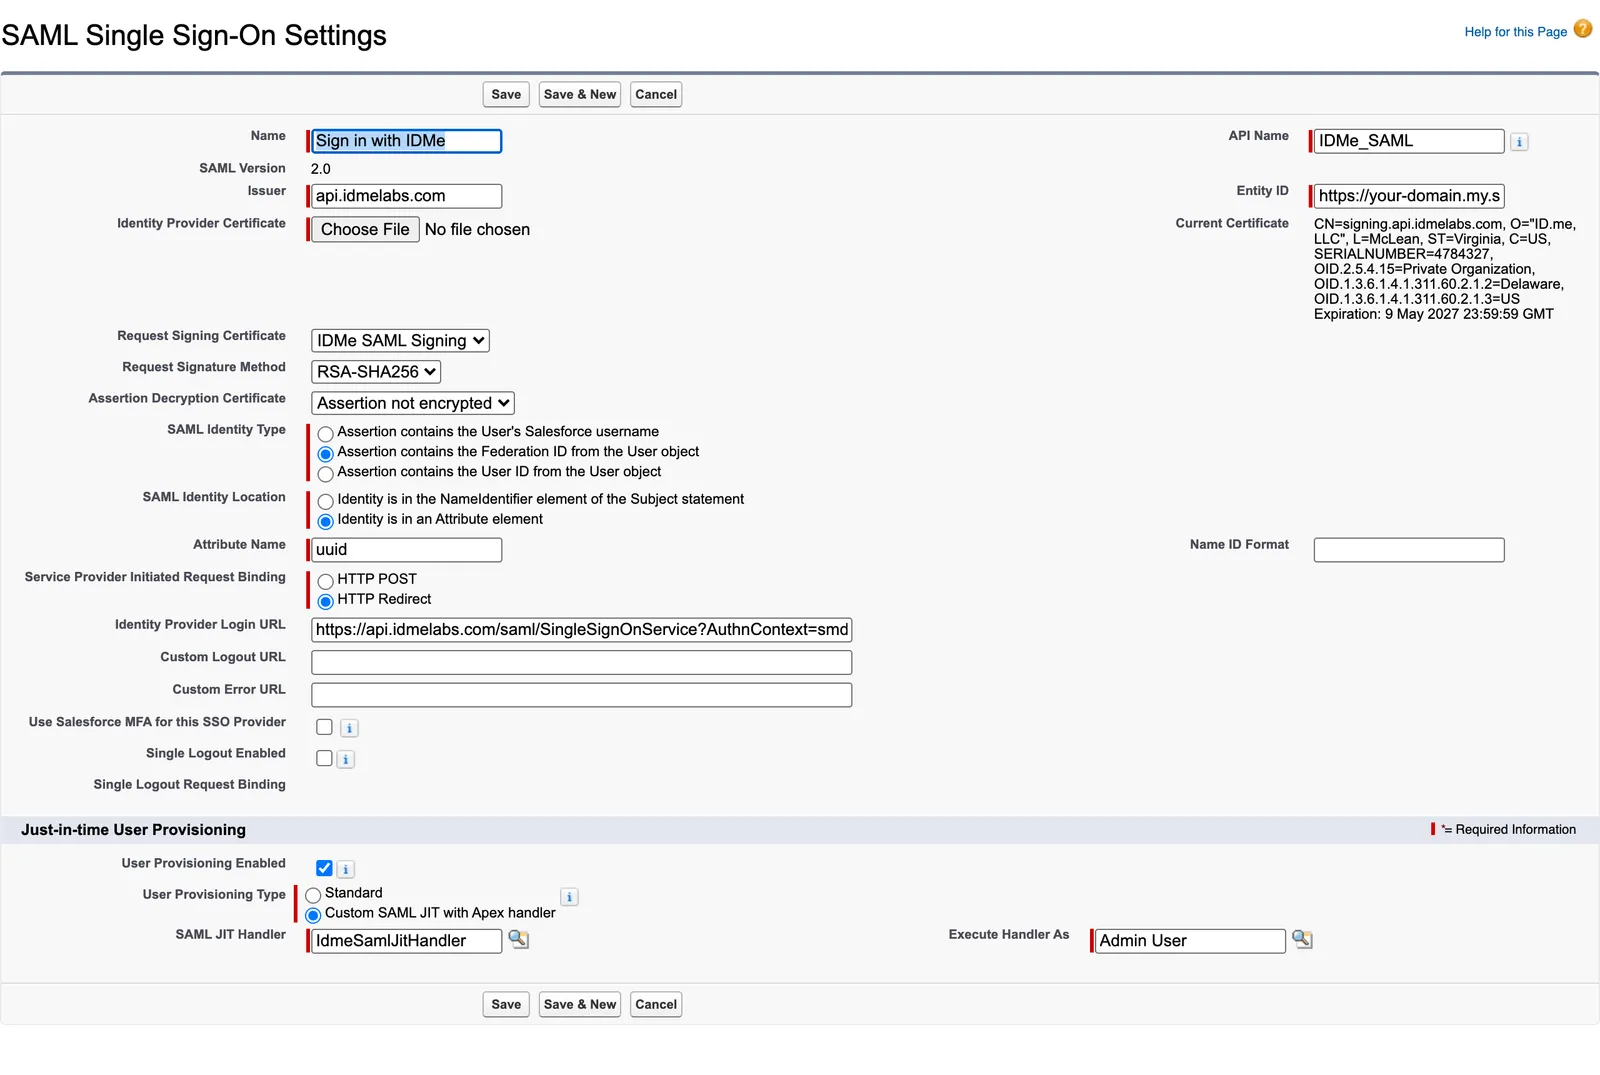
Select Save. Salesforce creates an Apex class named AutocreatedRegHandler followed by a number, and sets it as the SAML JIT Handler.
Salesforce does not allow Apex classes to be created or edited directly in a production org. Generate and adapt the template in a sandbox, then deploy it to production. The generated template does not include a test class, so your developer also writes test classes that meet Salesforce’s code coverage requirement.
Adapt the JIT handler template
The generated class already creates or updates the Account, Contact, and site user on each sign-in. It reads attributes by their Salesforce names, such as User.Email and Contact.LastName. IDMe sends attributes under IDMe names, such as email and lname, so the template needs one addition before it can use them. Your Salesforce developer or implementation partner makes this change. The rest of the template stays as Salesforce generated it.
At the start of the template’s handleJit method, add a step that:
- Copies the attributes map. Salesforce passes the map as read-only, so the step adds values to a copy.
- Copies each IDMe attribute into the Salesforce names the template reads, using the table below.
- Adds the values that come from your org rather than from IDMe, using the second table below.
The attributes returned depend on your IDMe policy. Confirm the list with your IDMe Solution Consultant.
Custom and sensitive attributes
Some IDMe attributes have no matching field in the template, such as the Social Security number (social) returned by policies that include identity verification. To store one of these attributes:
- Decide whether you need the value itself. If your site only needs to know that a member is verified, the IDMe policy already establishes that, and a field such as a verified flag or the last four digits is often enough.
- Create a custom field for the value. Navigate to Setup > Object Manager, select Contact (or User), then Fields & Relationships > New. For a sensitive value such as a Social Security number, use the Text (Encrypted) field type, which masks the value, and restrict access with field-level security. Orgs with Salesforce Shield can use Platform Encryption instead.
- Have your developer set the field from the IDMe attribute in the template. For a User field, add it where the template’s
handleUsermethod is marked “Handle custom fields here”. For a Contact field, add it in thehandleContactmethod, alongside the Contact fields the template already sets.
Store a sensitive attribute only if your use case requires it. Keep sensitive values out of debug logs and error messages.
Example: military verification
A policy that verifies military status returns the sign-in attributes (email, fname, lname, uuid) plus attributes that describe the member’s verified affiliation. For example, a sandbox sign-in through a military policy returned:
Attribute names depend on how your policy is configured. For example, the affiliations attribute can arrive as subgroups or military_subgroups, and policies can also return attributes such as military_branch. Confirm the list with your IDMe Solution Consultant.
To store the affiliation:
- Create a custom field on the Contact (or the User, if your site’s visibility rules read User fields). Because a member can hold more than one affiliation, use a Picklist (Multi-Select) field with the values above, or a text field.
- Have your developer set the field from the affiliations attribute in the template, in
handleContactfor a Contact field or at the “Handle custom fields here” marker inhandleUserfor a User field. Test with a sandbox member who holds more than one affiliation to confirm how the handler receives multiple values. - Set the field on every sign-in, not only the first. The template runs on each sign-in, so a member whose status changes, for example from
Service MembertoVeteran, is updated the next time they sign in.
By default, IDMe sends a successful SAML response only after verification succeeds, so the handler does not need a separate path for unverified members. A member who declines to share their attributes returns to Salesforce with an error response instead, and sees the site’s single sign-on error page. To show your own page, set Custom Error URL in the SAML settings.
For more advanced use cases, such as reusing existing Contacts or a custom member data model (for example, Nonprofit Cloud), your developer can extend the template further or build a handler that implements the Salesforce Auth.SamlJitHandler interface.
Add IDMe to the site login page
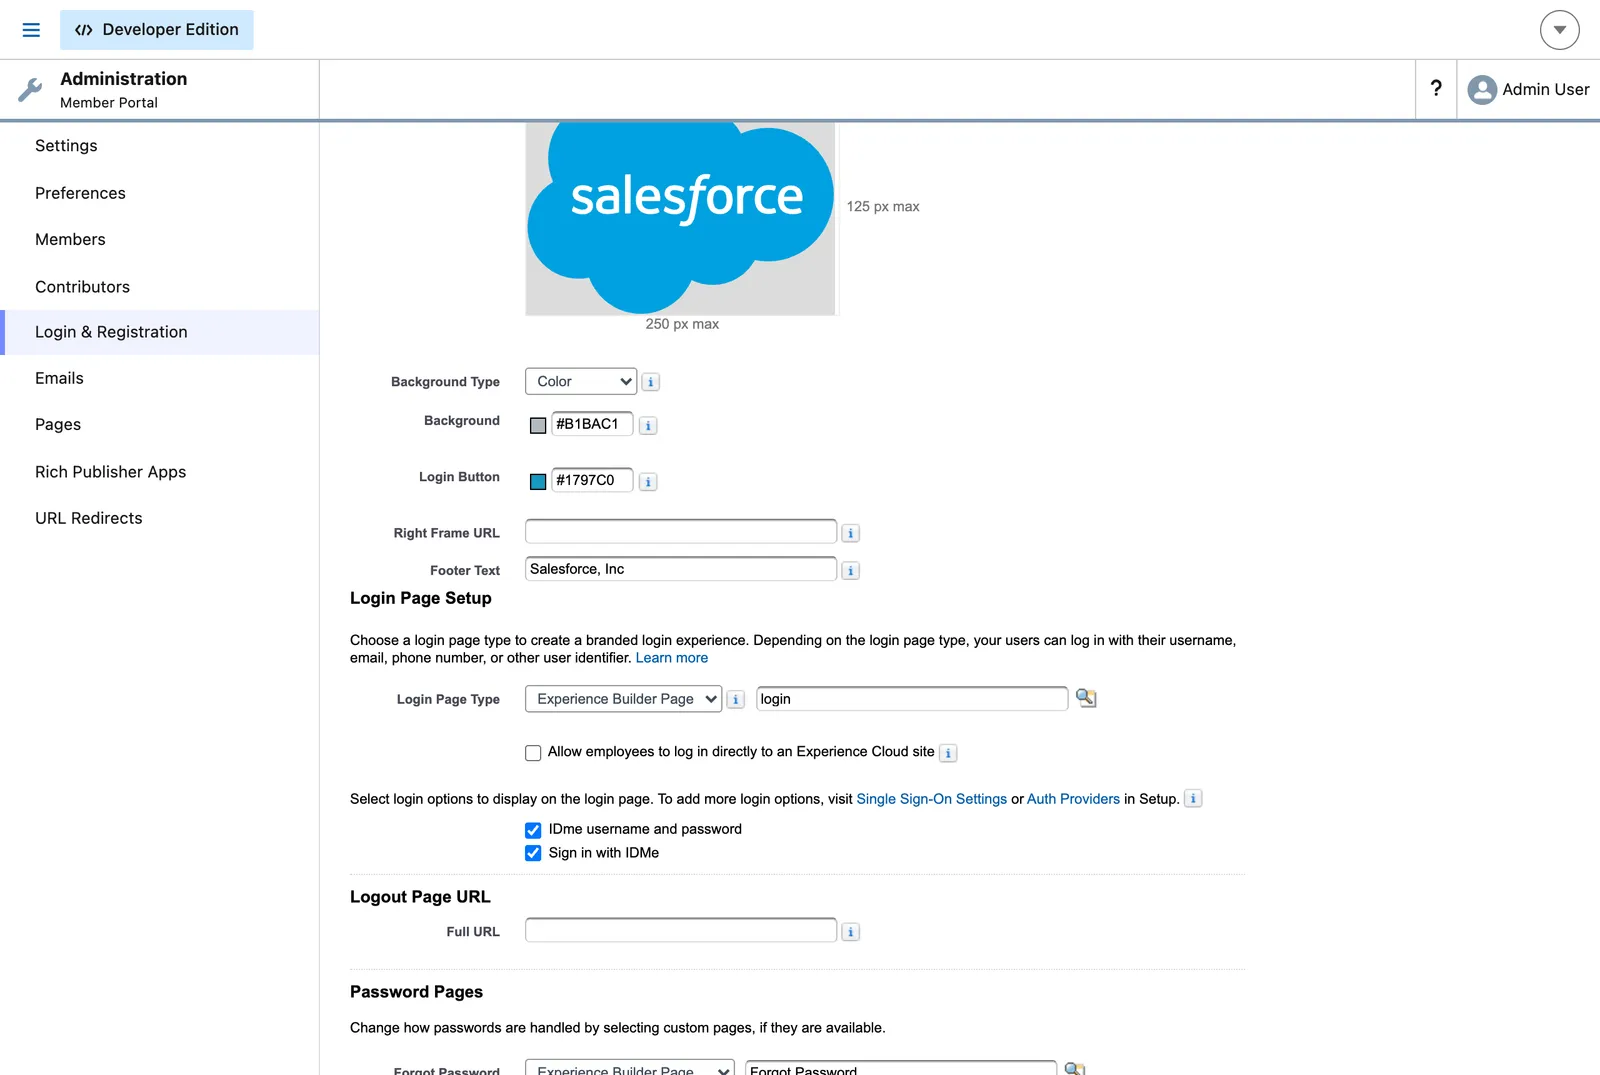
Display the IDMe button
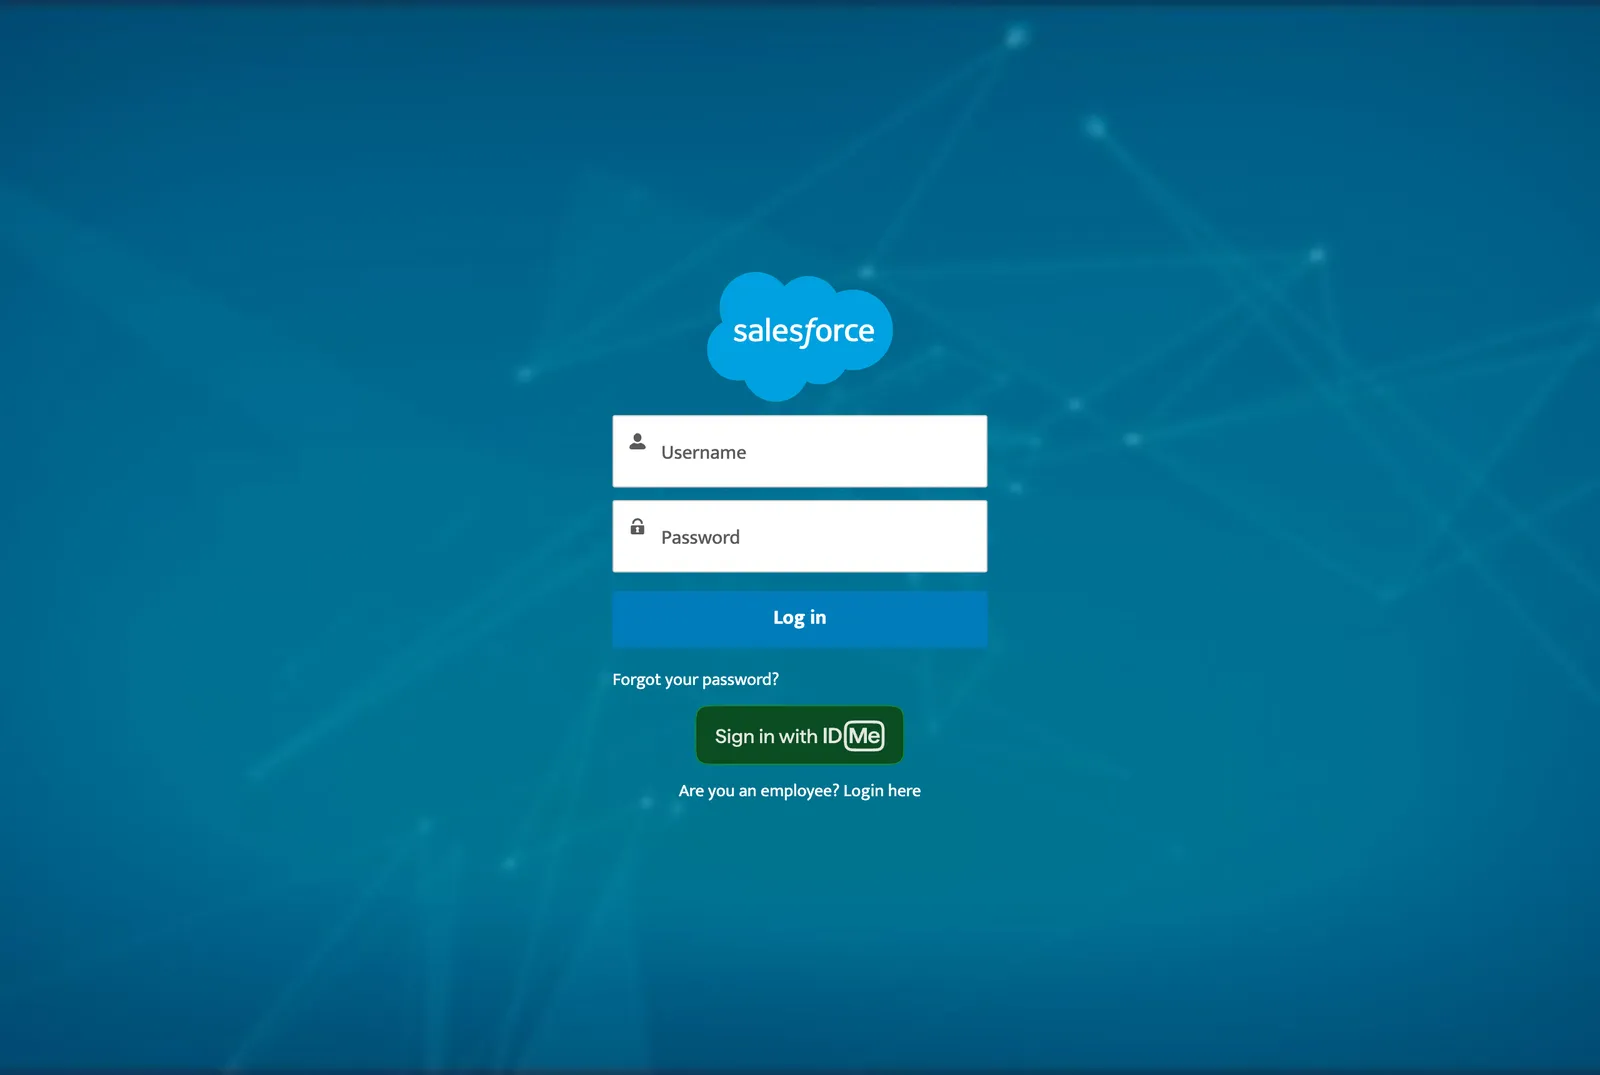
Salesforce renders the SAML option as a standard button labeled with the Name of the SAML configuration. To display the official Sign in with IDMe button, your site developer applies the button SVG from the IDMe brand guidelines to that button, either with custom CSS in Experience Builder that targets the single sign-on button or with a custom login component, then publishes the site. Salesforce can change the login page markup between releases, so recheck custom CSS after each Salesforce release.
Configure IDMe
This portion of the configuration is completed by an IDMe Solution Consultant. You will need to provide the following information to complete the setup:
SP Entity ID
The Entity ID from your SAML configuration. In this guide, the site URL:
https://<your-domain>.my.site.com/<site-prefix>
Assertion Consumer Service (ACS) URL
The site ACS URL follows this pattern:
https://<your-domain>.my.site.com/<site-prefix>/login
Provide the ACS URL exactly as shown, without the ?so=<org ID> parameter that Salesforce displays on the SAML configuration page. Salesforce sends the URL without it, and IDMe rejects a request whose ACS URL does not match.
Salesforce signing certificate
The certificate you downloaded in Create a request signing certificate, in PEM format. IDMe rejects signed AuthnRequests until this certificate is on file.
Policy handle name
Confirm the IDMe policy handle with your Solution Consultant. This value determines the identity verification level and attributes returned in the SAML assertion, and is configured in Salesforce as the AuthnContext parameter on the Identity Provider Login URL.
IDMe returns the following attributes for a sign-in policy. Policies that include verification return additional attributes.
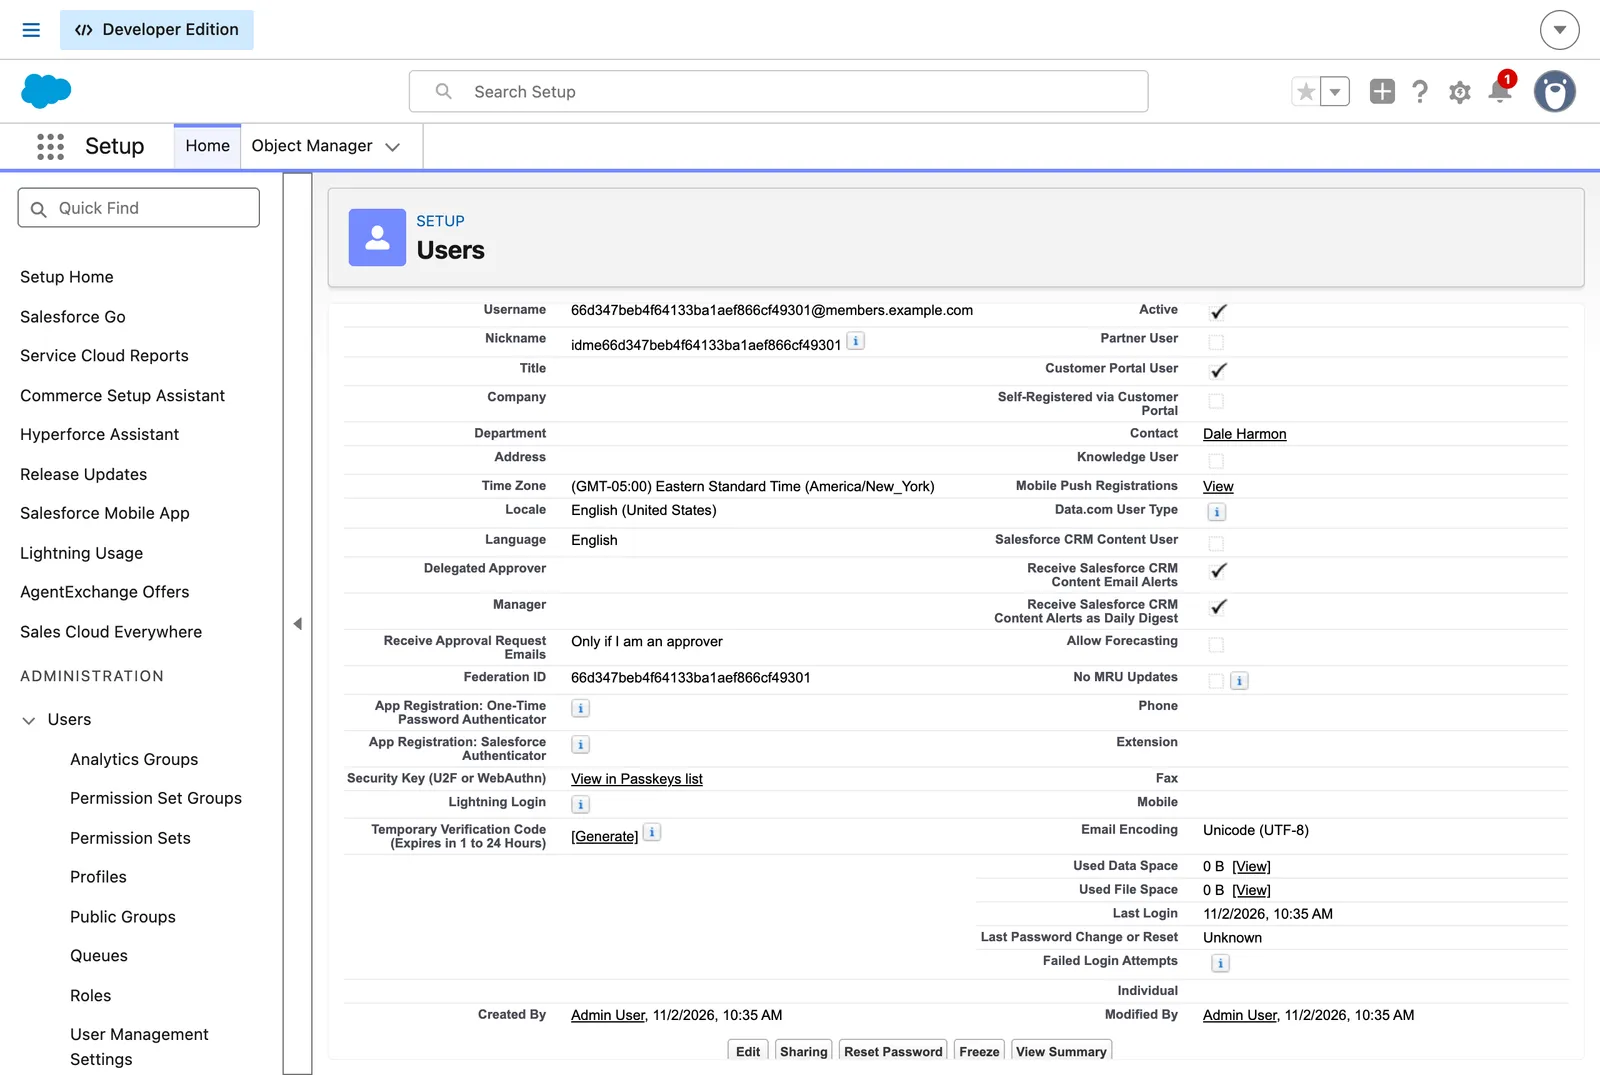
Test the integration
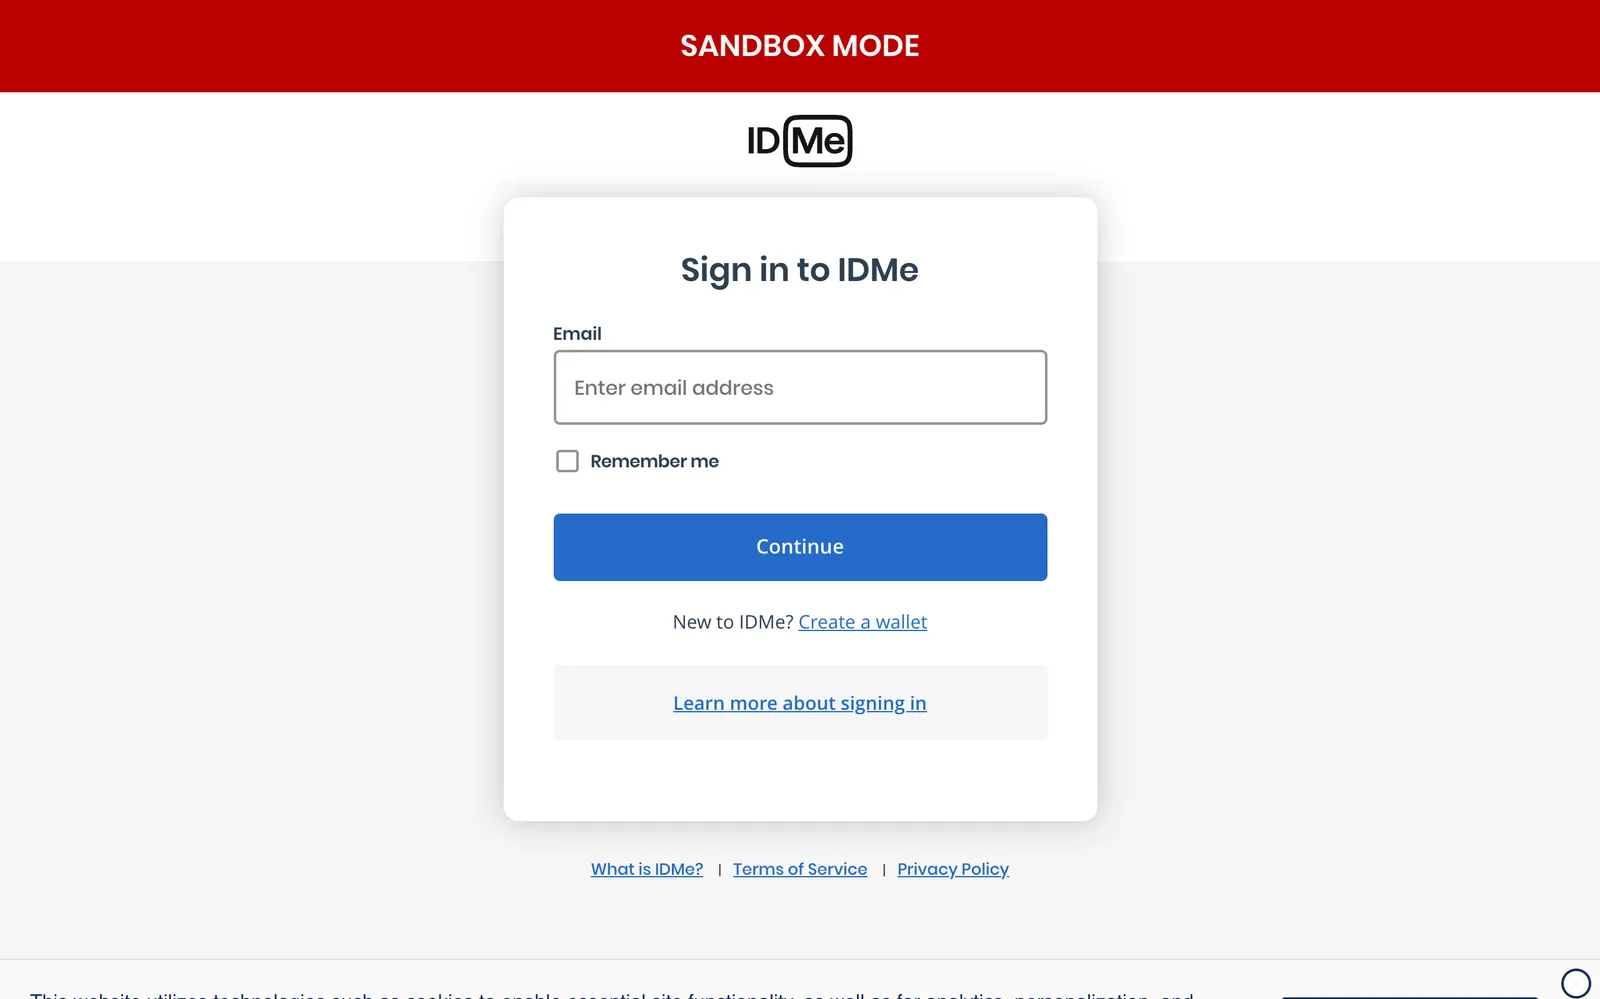
Troubleshooting
IDMe displays “Something went wrong” after selecting Sign in with IDMe
IDMe rejected the AuthnRequest. The two most common causes are an ACS URL mismatch (the registered ACS URL includes ?so=<org ID>) and a missing Salesforce signing certificate. Confirm both with your Solution Consultant.
The IDMe option does not appear under Login Page Setup
SAML is not enabled for the org. Navigate to Setup > Single Sign-On Settings, select Edit, and select SAML Enabled.
Salesforce displays “Single Sign-On Error” after returning from IDMe
Navigate to Setup > Single Sign-On Settings and select SAML Assertion Validator. The validator shows the last failed assertion and the reason. “Unable to map the subject to a Salesforce user” means the JIT handler did not create the user; check the Apex debug log for the Execute Handler As user.
JIT handler fails with FIELD_INTEGRITY_EXCEPTION
The site user profile is a standard external profile and the org does not allow it. Navigate to Setup > Digital Experiences > Settings and select Allow using standard external profiles for self-registration, user creation, and login, or use a cloned custom profile.
JIT handler fails with DUPLICATES_DETECTED
A duplicate rule matched the new Contact to an existing one. Update the JIT handler to allow the save when a duplicate rule alerts, or to look up and reuse an existing Contact by email before creating a new one.
Site displays “down for maintenance” after signing in with IDMe
The JIT handler stopped with an unhandled error. Check the Apex debug log for the Execute Handler As user. A Collection is read-only error means the handler adds values to the attributes map Salesforce passes in, instead of to a copy.
Returning users fail with “Could not find account”
Set User.Account on every sign-in. If it is missing on the first sign-in, the template creates a separate Account for each user. If it is missing on later sign-ins, sign-in fails.
Request Signing Certificate cannot be saved
Salesforce does not allow the default certificate to sign requests. Create a self-signed certificate as described in Create a request signing certificate.
Assertion signature fails after an IDMe certificate rotation
IDMe rotates signing certificates with an active="true" element in its metadata. When IDMe announces a rotation, upload the new active certificate to the Identity Provider Certificate field. The uuid, and the users keyed on it, do not change.